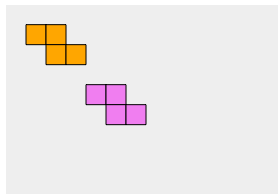
Very simple Python Twitter clone with AJAX front end

As a developer I have often come across situations where I have wanted to make a quick and dirty web server to allow people (or pieces of software) to post messages that can be seen from a common URL.

Maybe you want to send out a quick survey as an HTML form, or maybe you want to make some kind of a twitter-like messaging system for internal company use.

In my case I wanted to add a quick and dirty message-passing scheme to an existing internal continuous build web front-end so that users could send messages to each other about the state of the build. (“I’m fixing this crash”, or “No check-ins right now please”)

Essentially, I wanted something like a “micro blogging” application — a twiitter clone.

Searching Google for for “python twitter clone” there are plenty of hits and different directions this can take you. Right off the bat the thing that I notice is that they are almost all dependent on some framework — Flask, Django, Web2py, etc. Not wanting to learn all of the jargon associated with a framework or introduce extra unnecessary dependencies I set out to find out if there was an easy way to do this without tying myself in to a framework.

It turns out it’s not very hard to make something from scratch just using the BaseHTTPServer library that ships with Python, but I found it hard to find specific examples of a server that combined the features that I wanted:

  • Taking POST’ed form data and storing it for later retreival
  • Serving form data as JSON for easy use with an AJAX front end
  • Persisting the data between server sessions
  • Implementing queries to Add and Remove data via an HTML form or from Javascript

I came up with something that’s quite simple and and general purpose that I thought was worth sharing.

For a starting point, my reference was this site which shows how to make the BaseHTTPServer serve files and handle GET and POST request.

Since this is all very abstract, I’ll give you an idea where I’m going with this in the screenshot below:

Ajax Web interface screenshot

This is the AJAX version of my Javascript front end. You can type in your name and the note that you want to post. When you press enter in the second textbox, it makes a POST request to the python server to store the data. Upon regular intervals, the Javascript does a GET query to get the full set of messages in JSON format and then updates the boxes at the bottom. So, this is a “single page web app” that you can run from two different machines (or just in two separate browser windows) and watch the messages appear on both browsers when they are entered from either one.

Here’s how I modified the do_POST member of the BaseHTTPHandler to store the form data as a dictionary

	def do_POST(self):
		form = cgi.FieldStorage(
			fp=self.rfile, 
			headers=self.headers,
			environ={'REQUEST_METHOD':'POST',
	                 'CONTENT_TYPE':self.headers['Content-Type'],
		})

		if self.path=="/post":

			formData = { key : form[key].value for key in form }
			data = self.getStoredData()
			data.append(formData)
			self.setStoredData(data)

			self.sendStoredDataAsJson()

			return			

The first line takes the POST’ed data and turns it in to a FieldStorage object. The only other part here that really merits explanation is the line

			formData = { key : form[key].value for key in form }

which is done because the “form” variable is a dictionary where the values are objects of type MiniFieldStorage. For my purposes, all I really wanted was a dictionary with strings as the values, so the line above just unpacks the MiniFieldStorage.value and makes a dictionary from those.

the getStoredData and setStoredData functions are essentially just accessors that I created to a global list variable:

	def setStoredData(self, data):
		global storedData
		print ( "setting data:  " + str(data) )
		storedData = data
		saveState()

	def getStoredData(self):
		global storedData
		return storedData

Since I wanted the data to persist between sessions of the server I added the call to saveState() each time the setter is called. saveState() and the corresponding loadState() which is called on startup are implemented using python’s very handle pickle serialization mechanism:

def saveState():
	global storedData
	f = open(stateFile, "w")
	pickle.dump(storedData,f)
	f.close()

def loadState():
	global storedData
	if os.path.exists(stateFile):
		f = open(stateFile, "r")
		storedData = pickle.load(f)
		f.close()
		print ( "loaded " + str(storedData) )

In addition to the /post URL defined in the do_POST function, I also provided a /remove URL for getting rid of data elements that we no longer want:

		if self.path=="/remove":

			formData = { key : form[key].value for key in form }

			# We should remove a data element if it matches all of the key-value pairs
			#  in the formData
			def shouldRemove( storedFormData ):
				return all ( (key in storedFormData and storedFormData[key]==formData[key]) for key in formData ) 			

			oldData = self.getStoredData()
			newData = filter( lambda x: not shouldRemove(x), oldData )

			self.setStoredData(list(newData))

			self.sendStoredDataAsJson()
			return			

I did my initial testing using an old-style non-AJAX HTML form:

	<h2>Static Form Interface - Boring!</h2>

	<div>
	<h3>Post a new record</h3>

	<form action="post" method="POST">
		<p>Name<input name="name" type="text"></input></p>
		<p>Note<input name="note" type="text"></input></p>
		<input type="submit">Submit</input>
	</form>

	<hr>

	<h3>Remove a record</h3>

	<p>The server will remove all records which match the name you enter below.</p>

	<form action="remove" method="POST">
		<p>Name<input name="name" type="text"></input></p>
		<input type="submit">Submit</input>
	</form>

	<hr> 

On this interface, when you press the submit button it takes you away from that page and to another page with the response (sent as JSON)

After this was working I moved on to prototyping this as a single page app. The core of this is a ‘get’ request which is polled periodically. The request callback takes the json data returned from the Python server and uses JQuery to add a box for each data entry on the server (the grey blocks you see in the screenshot above):

function getData()
{
	var url = "/data"
	$.get( url, undefined, onDataReceived ) 
}

function onDataReceived( data )
{
	// display pretty-printed json in HTML pre tag.
	$("#data").text( JSON.stringify(data, undefined, 4) )

	// display one div per entry in the data
	cookedDiv = $("#cooked")
	cookedDiv.empty()
	if ( data  )
	{
		for ( var i=0; i<data.length; i++ )
		{
			// Create a div containing the 'name' and 'note' fields
			elementDiv = $("<div class='note'>").appendTo( cookedDiv )
			elementDiv.html( data[i].name + "<br>" + data[i].note )
			elementDiv.append("<hr>")

			// add button to this div for removing this specific data entry.
			var button = $("<button>").appendTo(elementDiv)
			button.text("remove")
			button.click( removeData(data[i].name, data[i].id) )
		}
	}

}

JQuery makes the POST queries to add and remove data elements straightforward:

function postData()
{
	var data = {}

	data["name"] = $("#name").val();
	data["note"] = $("#note").val();
	data["id"] = createUniqueID();

	var url = "/post"
	$.post( url, data )
}

function removeData( name, id )
{
	return function()
	{
		var data = {}

		if ( id != undefined )
		{
			data["id"] = id
		}
		data["name"] = name;

		var url = "/remove"
		$.post( url, data )
	}
}

In the postData() function, I’m using JQuery to pull the values out of the form elements and stuff them into a javascript object called data, which is then shipped as the POST data.

the removeData() function works nearly the same way, except that it is a closure that binds the name/id of a specific note to the inner function, which is attached as the click handler of the remove button on each note. When clicked, the inner function posts the name/id to the /remove URL.

postData() adds an ‘id’ to each note to make them unique. To do this I used this implementation of a GUID generator I found on stack overflow, but any means of generating unique ID’s would suffice.

// GUID generator.
// Thanks broofa
//  http://stackoverflow.com/questions/105034/create-guid-uuid-in-javascript
function createUniqueID()
{
	var guid = 'xxxxxxxx-xxxx-4xxx-yxxx-xxxxxxxxxxxx'.replace(/[xy]/g, function(c) {
    var r = Math.random()*16|0, v = c == 'x' ? r : (r&0x3|0x8);
    return v.toString(16);
	});

	return guid;
}

That’s the gist of it. To call this a “Twitter Clone” doesn’t really do justice to twitter, since it’s so minimal — it doesn’t even have user accounts! The point of this really is to make a simple mechanism for storing and persisting arbitrary form data. The HTML files above only contain fields for “name” and “note”, but the Python server is not bound to any particular set of form elements, so you could trivially add additional fields in the form without changing the server, and potentially extend this code for a wide range of applications.

The full source code is available on github:

https://github.com/uglycoyote/GenericFormDataServer

To run it, just run “python GenericFormDataServer.py” and browse to localhost:8080.

Reactris Part VIII: More Tetris, Less React

It’s been a couple weeks since I made the last post. I ended up with something that was starting to look a little more like Tetris but without some of the rules. Most importantly, it did not detect any collisions between the pieces, so the pieces would overlap each other which they don’t do in the actual game.

This sequence of blog postings was really about learning React.js and not so much about tetris, and since I had basically accomplished what I wanted to as far as being able to render the tetris game using React components I was not feeling very motivated to continue. However, I didn’t really want to leave the blog unfinished since this is my first attempt at doing a learning project like this as a blog and I wanted to follow through with it.

So I continued working on the game-logic part of this, and without going in to to much detail, here’s basically what I did:

Up until now I had been representing the game state essentially as just a collection of game pieces (their shape type, and position) and this representation didn’t really lend itself to easily figuring out whether two pieces are overlapping. In Tetris, it’s essentially a grid of boxes where each box is only allowed to be occupied by one piece. Going along with this model, I added in a 2-D array into my TetrisGame class which represents the current state of the game board, with a 0 in the array element representing a vacant square and a 1 representing an occupied square.

In order to populate the array, I needed to write a function to “render” a piece into the array. This consists of iterating over the squares that make up the piece, transforming them according to the current position and rotation of the piece, and then writing the 1 into the corresponding array element.

This looks something like this:

    TetrisGame.prototype.drawPieceIntoGrid = function( piece, callback )
    {
      var blocks = reactrisShapeDescriptions[piece.type]

      // Iterate over the rectangles in the piece
      for (var i=0; i<blocks.length; i++ )
      {
        var block = blocks[i]
        var x = block[0]
        var y = block[1]

        // Rotate and translate -- xFinal, yFinal are the final coordinates 
        //  if this rectangle in the grid.
        var rad = piece.rot * Math.PI / 2.0
        var xFinal = Math.cos(rad) * x - Math.sin(rad) * y
        var yFinal = Math.sin(rad) * x + Math.cos(rad) * y
        xFinal = Math.round(xFinal)
        yFinal = Math.round(yFinal)

        xFinal += piece.pos[0]
        yFinal += piece.pos[1]

        // Call callback with the coordinates to either draw or check the grid element.
        if (callback(xFinal, yFinal))
        {
          return true
        }
      }
      return false
    }

(originally, the last few lines would do this.grid[xFinal,yFinal]=1, but I later found that I would need to write a very similar looking function to read the grid elements when checking whether a new piece would collide with existing pieces, so I instead used a callback at the end, allowing writing and reading the grid elements with the same function and avoiding duplicating all of the tricky transformation code)

It’s worth noting here that this is the second place I needed to write code to rotate and translate game pieces. If you have read through this entire series of blog posts, you might remember that earlier I did some SVG transformations on the “g” (group) element that enclosed the game piece. So I actually found that it was a slight challenge to get the transformations in both pieces of code to match up so that the grid was showing the same thing as the original SVG rendering of the game pieces. In order to verify that the two are perfectly in sync, I added code in my top-level React component to render both representations — the ReactrisShape components which I was drawing before, and now drawing the game grid as as simply a collection of Rectangle components:

  // Draw all of the shapes as ReactrisShape components.
  pieceComponents = tetrisGame.pieces.map( 
    function(piece) 
    {
      var color = shapeColors[piece.type]
      return <ReactrisShape type={piece.type}
        x={piece.pos[0]} 
        y={piece.pos[1]} 
        rotation={piece.rot*90} 
        color={color}/>
    } 
  )

  // Draw the TetrisGame's grid using individual Rectangle components.
  //  (should match up with ReactrisShape's drawn above.)
  var gridRects = []
  for ( var j=0; j<tetrisGame.height; j++ )
  {
    for ( var i=0; i<tetrisGame.width; i++ )
    {
      if ( tetrisGame.grid[i][j] > 0 )
      {
        var y = (j+0.5)*gridSize - 2;
        var x = (i+0.5)*gridSize - 2;
        var rectangle = <Rectangle x={x} y={y} width={gridSize+4} height={gridSize+4}/>
        gridRects.push(rectangle)
      }
    }
  }

So I won’t continue to bore you with the details, but essentially just rendering the existing pieces into the grid as 1’s and then checking whether the active piece overlaps the other pieces using the above code was all that was needed. When a collision is detected, I prevent the piece from being moved (in the case that the user is pressing left or right) or spawn a new piece (in the case that they pressed down and hit something below the active piece.)

You can check out the nearly-complete tetris game here.

I was getting a little tired of the tiny javascript editor windows on JSFiddle, they don’t work very well for an example of this size, so I decided to try out another site, JSBin. It’s a little nicer in that you can toggle the various viewports so when you want to have a full page of javascirpt you can do that.

At this point it feels more or less like a working tetris game, except I didn’t implelement a couple key game features:

* Making the active block fall one row every n seconds (this would be pretty trivial)
* Removing completed rows from the game board so that all the blocks above that row fall down.

The latter of these is a pretty key game element, it’s what allows you to keep going without the board filling up. And it’s one that I kind of neglected to think about in my UI design. The concept in my head was that I basically just needed to render a collection of ReactrisShapes, which are complete tetris shapes, and I didn’t think about what happens when you complete a row and the shape gets sliced up.

At the point that I realized this, it seemed like the logical thing to do would be to only represent the active game piece as a full shape and fall back to representing everything else as a Rectangle elements as I am rendering in the double-for-loop in the code sample above. This makes the UI React.js side of things even more trivial than it was before. At this point I almost feel like the React side of this was so simple that I should have chosen a more interesting task to realize in React.js as an example.

But reflecting back on it, it has been a good learning experience, and these are the things that I took away from it all:

* How to set up React.js and branch one of their examples
* How to use React within jsfiddle and jsbin
* How to create React components
* How to use React properties and state
* How to incorporate SVG into React.js
* Some React gotchas like not being able to return multiple sibling components, and the workarounds.
* How to update the state to cause the React component to refresh
* How to pass properties down to child components
* How to to store an explicit reference to a component instance (the “ref” attribute)
* Some good general UI building advice: Don’t design your UI until are clear what the problem domain is (in this case, I probably should have written more of the tetris game code up front, or at least thought about what was needed more deeply.)

Reactris Part VII: Transferring control to a new game piece

So far we have drawn all the tetris pieces and made it so that you can control one piece.

My next step will be to introduce the pieces one at a time and make it so you can only control the last piece that was introduced.

As I started down this path, I started to abstract out some more of the hard-coded things, like the shape-type and the color of the current piece. Before, I had a bunch of state variables in my component like currentPiecePos and currentPieceRot, and I was about to add some new ones. I also realized that I was going to have to store away the pos/rot/type/color of pieces that have been placed already. So I thought it made sense to abstract the concept of “piece” into a javascript object. I started writing a method in my component for creating a new piece:

  createNewPiece: function()
  {
      piece={}
      piece.pos = [1,1]
      piece.rot = 0
      piece.type = 0
      
      return piece
  }

and started changing some of the state initialization to look more like this:

  getInitialState: function()
  {
      return ({
          currentPiece: this.createNewPiece(),
          placedPieces: []
      });
  },

The hangup happened when I tried changing my movePiece and rotatePiece functions. Previously, movePiece had called “setState” on the currentPiecePos variable. Now it seemed to make sense to do this:

  movePiece: function(x,y){
        this.setState ({
          currentPiece.pos:            
              [this.state.currentPiece.pos[0]+x,
              this.state.currentPiece.pos[1]+y]
      });
  },

However I get a “parse error, unexpected token .”.

In other words, I think what React is trying to tell me is that I’m not allowed to call setState and set a variable within currentPiece, I can only set top-level things with the state.

At this point, I started to think that maybe when we need to move the piece we should create a clone of the currentPiece, make the changes, and then do setState({currentPiece: clonedPiece}). Perhaps that would work, but it was starting to feel like the wrong approach. As a did some more internet searches about how to handle deeper objects in a React component’s state, I ran in to tutorials like this one:

View at Medium.com

which has a lecture at the end about avoiding the use of state whenever possible…

and postings like this one:

https://news.ycombinator.com/item?id=7613462

where the people discussing React state say that it has a “code smell”.

I think these guys might be right… my code is starting to smell here.

The trouble is I’m starting down the road of implementing the Tetris game logic inside my React component, when perhaps that should be a whole separate entity, and the React components should be just handling the UI or the “view” of the tetris game. That feels more like the right answer.

So I have embarked on a bit of code shuffling to accomplish the following goals:

  • Create a TetrisGame class to maintain the list a pieces
  • Create a TetrisPiece class to maintain the state of a piece, like the position, rotation, and type of piece.
  • The game operations like movePiece, rotatePiece, createPiece are now part of the TetrisGame class.
  • tetrisGame, The instance of the TetrisGame class is passed in as a prop to the ReactrisSVG class, which then constructs the corresponding ReactrisShapes for all of the game pieces
  • I moved the key event handling back to the global scope. Arrow keys call tetrisGame.movePiece.
  • I now store a global instance of the ReactrisSVG component in the reactrisSVG variable

after these changes the ReactrisSVG component has gone back to being quite compact and dumb. Essentially the meat of it is just the conversion from TetrisPiece objects in to ReactrisShape components:

  var tetrisGame = this.props.tetrisGame

  pieceComponents = tetrisGame.pieces.map( 
    function(piece) {
      return <ReactrisShape ref="currentPiece" type="0" 
        x={piece.pos[0]} 
        y={piece.pos[1]} 
        rotation={piece.rot*90} 
        color="yellow"/>
    } 
  )

After keyboard events, I push the new data in to the ReactrisSVG component like this:

  reactrisSvg.setState( {tetrisGame: tetrisGame} )

which results in the game view being updated.

To make things start to feel a bit more like Tetris, I added a DetectCollisions function into the TetrisGame class. Later I’ll implement collision detection between game pieces, but currently I’m just detecting whether the piece hits the “bottom”. When the piece hits a certain y coordinate, it calls TetrisGame.createPiece, and the newly created piece now becomes the target of key events.

progress updated: http://jsfiddle.net/uglycoyote/z0aj3ysv/32/

(In this updated version, there is just one piece present at the beginning. When you move it to the bottom of the playing area, another piece will be spawned)

Going through the excercise of starting to write the actual game logic has made me realize the flaw in relying on SVG transformations to rotate and translate the game pieces. That approach is not going to help with detecting pieces colliding. To implement the collision detection, the most straightforward approach will be to just keep a 2-dimensional array representing the game grid, and marking each cel as being vacant versus occupied. I started down that road, constructing the array initialized to all zeros inside of the constructor of TetrisGame.

In the next blog post, I’ll start thinking about how to fill in this 2D grid from the set of game pieces that are rotated and translated in arbitrary ways, so that I can detect when the current piece hits an existing piece.

Reactris Part VI: Rotating a piece

In the last post, I hooked up keyboard events to move around one of the game pieces. This time I’ll investigate how to make the piece rotate too.

Just like we used the SVG transform to scale and translate the pieces earlier, it can also be used for rotation.

Just to demonstrate this, I changed the code that formulates the transform to include a 5 degree rotation at the end:

    var transformString = "scale("+gridSize+" "+gridSize+") translate(" + this.props.x + " " + this.props.y + ") rotate(5)"

This results in something that looks like this:

Rotated five degrees.

Really what we want to do is accept a rotation angle as one of the props of the BlockShape component.

    var transformString = "scale("+gridSize+" "+gridSize+") translate(" + this.props.x + " " + this.props.y + ") rotate("+this.props.rotation+")"

unfortunately, if I run with this, all of the pieces are disappeared and I have a bunch of error messages saying that the transform attribute cannot be parsed. The issue is that now none of my Rectangle tags specify the rotation. And if you try to use a property that does not have a value specified for it, you get “undefined”. This brings up an important question that I have run into a couple times already but just worked around:

How do I specify a default value of a property in React.js?

This question is answered on this page http://facebook.github.io/react/docs/reusable-components.html

The answer is to implement the getDefaultProps function within the BlockShape component:

    getDefaultProps: function() {
    return {
      rotation: '0'
    };
    }

So now to add the rest of the plumbing so that I can control the rotation using the key event, I’m basically following the same steps that I did in the last tutorial:

Adding a new method to my ReactrisSVG component for rotating the current piece:

  rotatePiece: function( quarterTurns ){
      this.setState ({
          currentPieceRot:
              this.state.currentPieceRot+quarterTurns*90})
  }

Changing the ReactrisShape tag for the yellow piece to include the rotation:

  var currentPiece = <ReactrisShape ref="currentPiece" type="0" x={this.state.currentPiecePos[0]} y={this.state.currentPiecePos[1]} rotation={this.state.currentPieceRot} color="yellow"/>

Initializing the initial state of the currentPiecePos variable in the ReactrisSVG component:

  getInitialState: function()
  {
      return ({
          currentPiecePos: [1,1],
          currentPieceRot: 0
      });
  },

And changing the event handler to use the keys “1” and “2” to control rotation both clockwise and counterclockwise.

        charString = String.fromCharCode(e.keyCode)
    
        if (e.keyCode == '38') { context.movePiece(0,-1); }
        else if (e.keyCode == '40') { context.movePiece(0,1); }
        else if (e.keyCode == '37') { context.movePiece(-1,0); }
        else if (e.keyCode == '39') { context.movePiece(1,0); }
        else if (charString == '1') { context.rotatePiece(-1); }
        else if (charString == '2') { context.rotatePiece(1); }

Now this basically works (see http://jsfiddle.net/uglycoyote/z0aj3ysv/27/) but there are a couple things wrong with it:

Firstly, the piece is rotating around its corner, which causes it to swing up and out of view. Really we need to be rotating around a more central point. The trouble is when I wrote the arrays which define each of the game pieces, I used 0,0 as the upper-left corner of each piece. I’ll save this problem for later.

The more annoying problem at this point is that the key events are getting handled twice: once by the game, and then again by the browser. I noticed this a little bit with the arrow keys. They made the game piece move but also caused the browser to scroll around within the little tiny JSFiddle viewport that the game is in, which on my small laptop screen is not quite big enough to hold the entire SVG canvas. (if the monitor were bigger I might not have noticed this because the viewport wouldn’t scroll if the contents fit entirely inside).

When I started using the 1 and 2 keys, this was even more problematic. Currently i’m testing most of this under Firefox, and i have the “search when I start typing” setting turned on, which generally i find very useful, but in this case each time i press the 1 or 2 key it’s taking focus away from the game and acting as though I want to search for 1’s and 2’s in the page. However, I don’t have this problem under Chrome because Chrome does not have this feature (although I have used a plugin which implements this feature under Chrome on other machines)

Is there a way to have my event handler mark the key event as being handled so that the key event doesn’t get handled twice by two different systems?

It turns out that returning a value of false from the event handler cancels the event and prevents the browser from handling it:

        if (e.keyCode == '38') { context.movePiece(0,-1); return false; }
        else if (e.keyCode == '40') { context.movePiece(0,1); return false; }
        else if (e.keyCode == '37') { context.movePiece(-1,0); return false; }
        else if (e.keyCode == '39') { context.movePiece(1,0); return false; }
        else if (charString == '1') { context.rotatePiece(-1); return false; }
        else if (charString == '2') { context.rotatePiece(1); return false; }
       
           return true;

Now to tackle the pesky problem of the pivot point.

Actually, adding a couple more translations on to our SVG trasform solves this. This is where my games/graphics knowledge comes in handy. Rotation around a specific pivot point is equivalent to translating so that the pivot point becomes the new origin, rotating, and then translating again by the opposite of the pivot point offset.

For that yellow S-Shape, I want the pivot point to be at the centre of the second block from the left, so at 1.5, 0.5. Here’s my new transformString:

    var transformString = "scale("+gridSize+" "+gridSize+")   translate(" + this.props.x + " " + this.props.y + ") translate(1.5,0.5) rotate("+this.props.rotation+") translate(-1.5,-0.5)"

I may later want to have a different pivot point for each of the different shapes. But actually this 1.5, 0.5 looks like a decent choice of pivot point for most of the shapes.

Here’s the fiddle up to this point: http://jsfiddle.net/uglycoyote/z0aj3ysv/30/

That concludes this posting. In the next blog post I will need to start looking at some kind of a mechanism for shifting the controls to focus on different game pieces.

Reactris Part V: Moving a shape using the arrow keys

In the last posting, I succeeded in creating a generic block shape component that can represent and of the game pieces.

My next step is to start making this into a game by allowing the user to control the position of the pieces using the arrow keys.

Didn’t really know where to start, so I googled “javascript keyboard events” and found this useful Stack Overflow page: http://stackoverflow.com/questions/5597060/detecting-arrow-key-presses-in-javascript

I modified some code off one of the answers on that page so that each arrow key called into a movePiece function with different x,y values. For starters I just used an alert to make sure this was working, and it worked just fine.

document.onkeydown = checkKey;

function checkKey(e) {

    e = e || window.event;

    if (e.keyCode == '38') { movePiece(0,-1); }
    else if (e.keyCode == '40') { movePiece(0,1); }
    else if (e.keyCode == '37') { movePiece(-1,0); }
    else if (e.keyCode == '39') { movePiece(1,0); }
}

function movePiece( x, y )
{
    alert( "you want to move a piece by " + x + ", " + y );
}

Now how can we hook this in to our tetris game? The top level coponent (ReactrisSVG) will have to handle these key events and apply the movement to the ‘active’ game piece.

Figuring out how to actually hook this up to my React component took quite a bit of futzing around. My initial thought was to leave this movePiece function at the global scope and then have it call a method on my top level component.

So I added another movePiece function inside the dictionary that’s passed into AddClass (for the ReactrisSVG component), thinking I would just be able to call ReactrisSVG.movePiece. But this doesn’t work, because ReactrisSVG is a class and not an instance.

I did some googling around and ran in to this post which seemed like it was helpful:
http://stackoverflow.com/questions/24841855/react-js-access-to-component-methods

where the question-asker says “Why I can’t access the component methods from “outside” in React.js? Why it’s not possible and is there any way to solve it?”

the top rated answer suggested using “refs”: http://facebook.github.io/react/docs/more-about-refs.html

basically the idea with refs is that inside your render() function when you create subcomponents with a jsx tag, you can give them a refs=”instanceName” attribute, and then the parent component can later access that specific instance of the subcomponent as this.refs.instanceName.

So I attempted to give my ReactrisSVG element a name ‘theReactrisSVG’, but I ran into an error saying that I could not use refs with a top-level component. Then I went down the rabbit hole of trying to create an even higher-level component to put my ReactrisSVG inside, so that i could give it a name. But it was a chicken and egg problem, I still had no way to call a component method on the new top-level component.

So I eventually decided that I was thinking about it all wrong, rather than adding the document.onkeydown handler in the global scope, I should register this event handler within the ReactrisSVG component.

It’s not completely clear to me what the appropriate place to do that is because the component did not really have any initialization function. I ended up adding a new componentDidMount method, which is automatically called after your component has been created and added to the DOM.

The new ReactrisSVG component with key handling then looked like this:

var ReactrisSVG = React.createClass({
  getInitialState: function()
  {
      return ({
          currentPiecePos: [1,1]
      });
  },
  componentDidMount: function()
  {
      context = this;
      document.onkeydown = function(e)
      {
        e = e || window.event;
    
        if (e.keyCode == '38') { context.movePiece(0,-1); }
        else if (e.keyCode == '40') { context.movePiece(0,1); }
        else if (e.keyCode == '37') { context.movePiece(-1,0); }
        else if (e.keyCode == '39') { context.movePiece(1,0); }
      }
  },
      
  render: function() {

  var svgWidth = 300
  var svgHeight = 300

  var currentPiece = <ReactrisShape ref="currentPiece" type="0" x={this.state.currentPiecePos[0]} y={this.state.currentPiecePos[1]} color="yellow"/>

  return <svg width={svgWidth} height={svgHeight}
       xmlns="http://www.w3.org/2000/svg">
        {currentPiece}
        <ReactrisShape type="1" x="1" y="4" color="orange"/>
        <ReactrisShape type="2" x="5" y="1" color="red"/>
        <ReactrisShape type="3" x="5" y="4" color="violet"/>
        <ReactrisShape type="4" x="1" y="7" color="cyan"/>
        <ReactrisShape type="5" x="6" y="7" color="green"/>
        <ReactrisShape type="6" x="1" y="9" color="lightgreen"/>
  </svg>
  },
  
  movePiece: function(x,y){
  
      this.setState ({
          currentPiecePos:            
              [this.state.currentPiecePos[0]+x,
              this.state.currentPiecePos[1]+y]
      });

  }
});

In this updated version of the jsfiddle, you can now use the arrow keys to move around the yellow piece, which is the one which is hooked up to the currentPiecePos state variable.

http://jsfiddle.net/uglycoyote/z0aj3ysv/26/

Another subtle trick in the code above which took me a while to figure out, but what might be obvious to someone who’s been doing javascript for a long time, is that I could not call “this.movePiece” inside of my event handler, because “this” no longer referred to my ReactrisSVG component. I’m not quite sure what “this” refers to inside the event handler, but I think I have heard that it refers to the DOM element that sent the event. So, the fix for this is to stow away the reference to the ReactrisSVG component into a variable called “context” which is then available inside the handler.

In the next post I’ll look in to how I extend this to allow rotation of the game piece.

Reactris Part IV: Data-driven shapes

In the last blog entry, I was defining the S-Shaped tetris piece like this:

return <g transform={transformString}>
<Rectangle x="0" y="0" width="1" height="1"/>
    <Rectangle x="1" y="0" width="1" height="1"/>
    <Rectangle x="1" y="1" width="1" height="1"/>
    <Rectangle x="2" y="1" width="1" height="1"/>
</g>

But before creating a whole bunch of other pieces in this format, I wanted to try to make a more compact specification of the shape, like this:

blocks = [[0,0],[1,0],[1,1],[2,1]]

My first thought was to extract out the rectangles into a separate variable, like this:

    rectangles =     <Rectangle x="0" y="0" width="1" height="1"/>
        <Rectangle x="1" y="0" width="1" height="1"/>
        <Rectangle x="1" y="1" width="1" height="1"/>
        <Rectangle x="2" y="1" width="1" height="1"/>


    return <g transform={transformString} fill={this.props.color}>
    {rectangles}
    </g>

However, then you just get the complaint “Adjacent XJS elements must be wrapped in an enclosing tag” which I encountered also in the last post. That was my reason for adding the grouping element around the rectangles to begin with.

It turns out that we can get around this by appending all of the rectangle JSX elements into a list like so:

    rectangles = [<Rectangle x="0" y="0" width="1" height="1"/>,
        <Rectangle x="1" y="0" width="1" height="1"/>,
        <Rectangle x="1" y="1" width="1" height="1"/>,
        <Rectangle x="2" y="1" width="1" height="1"/>]

    return <g transform={transformString} fill={this.props.color}>
    {rectangles}
    </g>

My next thought, coming from working in a languages like c++ was to write a ‘for’ loop to construct this list of rectangles from the blocks array. But javascript has the much-nicer functional-programming style ‘map’ operation, allowing me to construct the rectangles by writing a function that converts [x,y] coordinates into Rectangle elements, and then mapping my function to each element of the array to create the new list of Rectangles:

var ShapeS = React.createClass({
    blocks:[[0,0],[1,0],[1,1],[2,1]],
    render:function(){
    
    var transformString = "scale("+gridSize+" "+gridSize+") translate(" + this.props.x + " " + this.props.y + ")"

    rectangles = this.blocks.map(function(xy,i){return <Rectangle x={xy[0]} y={xy[1]} width="1" height="1"/>})

    return <g transform={transformString} fill={this.props.color}>
    {rectangles}
    </g>
        ;
    }
})

(http://jsfiddle.net/uglycoyote/z0aj3ysv/20/)

My next goal is to break the definition of the blocks out of this class, so that I can have a more generic shape class:

var ShapeS = React.createClass({
    blocks:[[0,0],[1,0],[1,1],[2,1]],
    render:function(){
        return <BlockShape blocks={this.blocks}/>
    }
})

var BlockShape = React.createClass({
    render:function(){
    
    var transformString = "scale("+gridSize+" "+gridSize+") translate(" + this.props.x + " " + this.props.y + ")"

    rectangles = this.props.blocks.map(function(xy,i){return <Rectangle x={xy[0]} y={xy[1]} width="1" height="1"/>})

    return <g transform={transformString} fill={this.props.color}>
    {rectangles}
    </g>
        ;
    }
})

Unfortunately, this code has an error: the props.x and props.y specified on the ShapeS tag no longer make it down into the transformString.

Fortunately, I recalled seeing a ‘transferPropsTo’ function in some of the React demos, and didn’t quite understand what it was all about when I saw it, but now this sounds like exactly what I need. But after doing some further reading, it appears that the ‘transferPropsTo’ function is deprecated and there’s a new way of doing it, described in this section of the React docs:

http://facebook.github.io/react/docs/transferring-props.html

Long story short, the fix for this is just to add {…this.props} inside the tag and all of the properties of the ShapeS component are passed down in to the BlockShape component.

        return <BlockShape {...this.props} blocks={this.blocks}/>

(http://jsfiddle.net/z0aj3ysv/21/)

But rather than creating a separate class for each of the different tetris shapes I thought it would be better to just have an array of the different shape descriptions and be able to choose the shape using an index. This way later on when I need to choose a shape at random, I can select my shape easily using a random number and not need to create some kind of lookup table with the different shape classes.

In the code below, I make an array containing the the descriptions of each of the pieces, and make a generic ReactrisShape component that is parameterized by the shape type:

reactrisShapeDescriptions = [
    // S-Shape
    [[0,0],[1,0],[1,1],[2,1]],
    // Mirrored S-Shape
    [[0,1],[1,1],[1,0],[2,0]],
    // L-Shape
    [[0,0],[1,0],[2,0],[2,1]],
    // Mirrored L-Shape
    [[0,1],[1,1],[2,1],[2,0]],
    // Long Stick
    [[0,0],[1,0],[2,0],[3,0]],
    // Square
    [[0,0],[1,0],[0,1],[1,1]],
    // T-Shape
    [[0,0],[1,0],[1,1],[2,0]],
    
]

var ReactrisShape = React.createClass({
    
    render:function(){
        return <BlockShape {...this.props} blocks={reactrisShapeDescriptions[this.props.type]}/>
    }
})

To display all of the shapes, I then changed my top level component to contain one of each of the types and gave them all different xy coordinates and colors.

        <ReactrisShape type="0" x="1" y="1" color="yellow"/>
        <ReactrisShape type="1" x="1" y="4" color="orange"/>
        <ReactrisShape type="2" x="5" y="1" color="red"/>
        <ReactrisShape type="3" x="5" y="4" color="violet"/>
        <ReactrisShape type="4" x="1" y="7" color="cyan"/>
        <ReactrisShape type="5" x="6" y="7" color="green"/>
        <ReactrisShape type="6" x="1" y="9" color="lightgreen"/>

(http://jsfiddle.net/z0aj3ysv/24/)

Now we have something that looks like this:

All the different Reactris shapes

In the next blog post, I’ll start looking in to how to move the game pieces around in response to arrow key events.

Follow this link to Part V of this blog.

Reactris Part III: Shape Components

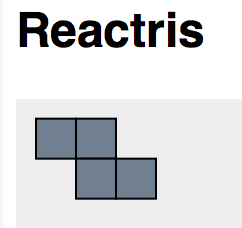
In the last post, I created a SVG Rectangle component which was parameterized by x,y, width, and height, and I concluded the post by drawing four rectangles to make a tetris “S” shape piece. (it takes some imagination to see it as the letter “S”, but you know the one i mean.)

Next I’ll try to create a single component that represents this shape.

here’s my first attempt at doing this:

var ShapeS = React.createClass({
    render:function(){
    return 
    
    <Rectangle x="10" y="10" width="20" height="20"/>
        <Rectangle x="30" y="10" width="20" height="20"/>
        <Rectangle x="30" y="30" width="20" height="20"/>
        <Rectangle x="50" y="30" width="20" height="20"/>;
    }
})

but this doesn’t work, in my developer tools window, I see the message: “Adjacent XJS elements must be wrapped in an enclosing tag”. What this is trying to tell me is that I cannot return four sibling Rectangle elements, I need to wrap them all in some higher level tag. If I was doing regular old HTML here I would wrap them in a Div, but I’m not sure if it make sense to have a Div inside of an SVG element.

A bunch of googling around for terms like “div inside svg”, “svg dummy parent”, etc eventually led to this page, which was interesting but didn’t answer my question:

http://biesnecker.com/2014/10/22/using-reactjs-to-draw-dynamic-svgs/

(but has a few neat little ReactJS SVG demos)

and then finally I came to understand that SVG has a tag called simply “g”:

The g element is a container used to group objects. Transformations applied to the g element are performed on all of its child elements. Attributes applied are inherited by child elements. In addition, it can be used to define complex objects that can later be referenced with the element.

(https://developer.mozilla.org/en-US/docs/Web/SVG/Element/g)

So, if I change the code above to include the ‘g’ tag it is able to work again:

var ShapeS = React.createClass({
    render:function(){
    return <g>
    <Rectangle x="10" y="10" width="20" height="20"/>
        <Rectangle x="30" y="10" width="20" height="20"/>
        <Rectangle x="30" y="30" width="20" height="20"/>
        <Rectangle x="50" y="30" width="20" height="20"/>
    </g>
        ;
    }
})

http://jsfiddle.net/uglycoyote/z0aj3ysv/8/

The blockquote above from the Mozilla documentation about the ‘g’ tag also hints at how we can now move around this shape as a whole. Initially I had been planning to parameterize the ShapeS component with an x and y and then calculating each rectangle’s x and y something like this:

    <Rectangle x="{10+this.props.x}" y="{10+this.props.y}" width="20" height="20"/>

But it would less verbose to simply leave the absolute coordinates in the rectangles the way they are and then to apply a translation to the entire ‘g’ element.

The Mozilla page for ‘g’ contains a list of the attributes that are allowable on the ‘g’ tag, one of which is the ‘transform’ attribute, which is linked to this page:

https://developer.mozilla.org/en-US/docs/Web/SVG/Attribute/transform

So I can do something like this:

var ShapeS = React.createClass({
    render:function(){
    return <g transform="translate(60 60)">
    <Rectangle x="0" y="0" width="20" height="20"/>
        <Rectangle x="20" y="0" width="20" height="20"/>
        <Rectangle x="20" y="20" width="20" height="20"/>
        <Rectangle x="40" y="20" width="20" height="20"/>
    </g>
        ;
    }
})

which draws the S-Shape at coordinates 60,60. The next step is to change the hard-coded 60,60 to use some x and y properties passed in from above. This seems like it should be trivial, the same kind of thing that we already did with the Rectangle component.

So I try changing the ‘g’ tag to look like this:

<g transform="translate({this.props.x} {this.props.y})">

But that does not work, I get an error saying:

Unexpected value translate({this.props.x} {this.props.y}) parsing transform attribute

doing a quick google search of that error message, I run across a Stack Overflow post where someone got an error with the same wording, but he’s using D3 and SVG, and not ReactJS. So this is something to do with an unexpected attribute value while parsing the SVG, it’s as if React is not substituting the curly braces with the property values before the attribute is being evaluated as SVG.

To work around this, it seems to help if I just formulate the attribute value as a string beforehand rather than embedding all of this in the JSX. This code works much better:

 
    var transformString = "translate(" + this.props.x + " " + this.props.y + ")"    
    return <g transform={transformString}>

(http://jsfiddle.net/uglycoyote/z0aj3ysv/9/)

Units Cleanup

Now, I have rather arbitrarily decided up to this point that the size of all of my rectangles in the S-Shape should be 20 units. But what if someone came along and told me they wanted the tetris shapes to appear slightly bigger or smaller? I’ve got so many hard-coded multiples of 20 in the code that it would be kind of hard to change that after the fact. But, hey wait, what did that first “S” in “SVG” stand for?? Oh yeah it’s “Scalable”. So I can apply a scaling to my coordinate system to make the blocks whatever size I want.

From that perspective, since the entire tetris game is laid out on a square grid, it seems like it would be nice to specify all of the shape coordinates in multiples of 1, and then just using scaling afterwards to make the block appear whatever size i want.

Here I go with that:

    var transformString = "translate(" + this.props.x + " " + this.props.y + ") scale(20 20)"
    
    return <g transform={transformString}>
    <Rectangle x="0" y="0" width="1" height="1"/>
        <Rectangle x="1" y="0" width="1" height="1"/>
        <Rectangle x="1" y="1" width="1" height="1"/>
        <Rectangle x="2" y="1" width="1" height="1"/>
    </g>

(http://jsfiddle.net/uglycoyote/z0aj3ysv/11/)

Now that kind of worked, but hey what happened to my nice grey blocks and why did the shape change slightly?

Funny Block Shape

What’s going on here is that I’m using both ‘stroke’ and ‘fill’ on my shapes. They have a black outline which happens to be of width 1 by default. When all of my shapes were of size 20, the width 1 outline was a nice thin line border, but now the outline of size 1 actually obscures the entire box!

The answer here is the css stroke-width property. Lets dial that down to what it was before — 1/20th the size of the box, which would be 0.05.

rect
 {
     fill : slategray;
     stroke: black;
     stroke-width: 0.05;
 }

Now we have this:

Two S-Shape pieces

at this point (http://jsfiddle.net/uglycoyote/z0aj3ysv/12/) I am still specifying the positions of the pieces in multiples of 20, as seen here

        <ShapeS x="0" y="0"/>
        <ShapeS x="80" y="80"/>

That’s because of the order of my translation versus scaling, which is important. Since the translation happens first, it’s happening in the coordinate space where one unit is one pixel. If I reverse the order like this:

    var transformString = "scale(20 20) translate(" + this.props.x + " " + this.props.y + ")"

Then what used to be 80,80 becomes 4,4 and specifying the shape coordinates like this:

        <ShapeS x="0" y="0"/>
        <ShapeS x="4" y="4"/>

puts them in the same position as before.

Another nice thing about the SVG ‘g’ element that I realized when looking at the documentation is that attributes like color trickle down to group members. So I can change my ‘g’ to have an orange fill color:

<g transform={transformString} fill="orange">

which didn’t immediately work, because I had already specified fill:slategray in the css of the Rectangle element, and since that’s more specific than the ‘g’ element, the slategray takes precedence. But if I remove the fill color from the rectangle css, then my orange color falls through to all of the rectangles in the shape.

But of course, this should be a property again…

<g transform={transformString} fill={this.props.color}>

and then I can pass the color through as an attribute of the SShape tag:

        <ShapeS x="0" y="0" color="orange"/>
        <ShapeS x="4" y="4" color="violet"/>

orange and violet pieces

it’s almost time to create the other tetris shapes, but I realized that I still had a hard-coded grid size of 20 within the code that builds the ‘transform’ string, and I didn’t really want to copy-paste code with a magic number like this. So I parameterized this as a variable:

    var transformString = "scale("+gridSize+" "+gridSize+") translate(" + this.props.x + " " + this.props.y + ")"

I debated about whether to make this another property, but it seemed like it would be awkward to have to specify this gridsize as an attribute of every shape I create. In Tetris, this is really a global, a number I only want to specify once. So in this case I just put this ‘var gridSize’ at the top of the file. React purists might frown on this, because from what I have read about React components, the idea is that the output of the component should only depend on the properties and state of the component, otherwise your component is not “deterministic”. This is good advice, you definitely don’t want to have your component’s output depending on some outside variable that is going to change. However, it seems appropriate or at least less evil to depend on a global which is truly constant.

The way I have it set up is nice, I can go and change the gridsize in one place and make the shapes bigger:

Bigger shapes

…or smaller…

Smaller Shapes

Now, I’ve gotten rid of the magic numbers in the SShape class, but it’s still a bit verbose to go copying this code and making all kinds of different versions of it. It seems like there should be a simpler way to describe a tetris shape. The S-Shape could really just be described as a list of square x,y coordinates like this:

[[0,0],[1,0],[1,1],[2,1]]

In my next post I’ll look at how to generate Rectangle tags from this simpler description of the shape, which will make it easy to have a really compact specification of the different types of tetris pieces.

Follow this link to Part IV of this blog.

Reactris Part II: More Squares!

In my last post I started learning React.js down the road to creating a simple SVG tetris game.

I googled “Reactris” to see if my blog had been indexed by google yet, and hilariously enough I found someone else who had also made a tetris clone in React called Reactris (https://github.com/jmorrell/reactris).  How unoriginal am I?

Well if unoriginality deterred me, I suppose I would not be making a tetris clone.   The point here is not to create a novel game but to explore React.   At least jmorrell doesn’t have an identical blog post (that I could find).  He took a stlightly different path, using HTML Canvas rather than SVG.   I was surprised to see how many files he broke everything up into!

Anyhow, carrying on with where I was…

This time I thought I would try mucking around with these ideas in an online code editor.  I looked at CodePen first, but it was not obvious if they supported external frameworks like React.  JsFiddle has all kinds of different framework options readily apparent in the left pane, so I started there.

If you google for jsfiddle react jsx template, you find a few different starting points.  I chose this one:

http://jsfiddle.net/vjeux/kb3gN/

which simply pulls in some external “react-js-fiddle-integration” script and gives you a “hello world” component to start out with.  From there it was pretty simple to cut and paste the HTML, CSS, and Javascript from the last blog post and get something started:  http://jsfiddle.net/uglycoyote/z0aj3ysv/3/

So in the current incarnation I have just a single React component which emits the HTML for an SVG element with a single rectangle.  Obviously I want to have multiple rectangles so the next step is to make the rectangle into its own component.

That looks something like this:

var Rectangle = React.createClass({
    render:function(){
        
       var x=10
       var y=10
       var width=100
       var height=50
       
       return <rect x={x} y={y} width={width} height={height}/>

    }
}
)

and then I can replace the HTML (or JSX) emitted by the main component (which I have now renamed to ReactrisSVG) with:

  return <svg width={svgWidth} height={svgHeight}
       viewBox="0 0 {svgWidth} {svgHeight}"
       xmlns="http://www.w3.org/2000/svg">

        <Rectangle/>
  </svg>

(http://jsfiddle.net/uglycoyote/z0aj3ysv/4/)

So far I haven’t made any effort to parameterize the rectangle. I could put 1000 Rectangle tags into my SVG component and they would all be the same size and at the same spot.

So the logical next step is to add some parameters to the Rectangle tag. React calls these properties or just ‘props’. As soon as you add some attributes to your HTML tag like this:

        <Rectangle x="10" y="10" width="20" height="20"/>

You can access them from your component as members of this.props:

var Rectangle = React.createClass({
    render:function(){
               
       return <rect x={this.props.x} y={this.props.y} width={this.props.width} height={this.props.height}/>

    }
}
)

http://jsfiddle.net/uglycoyote/z0aj3ysv/5/

This seems, at the same time, both simple and elegant and also scary and brittle. It’s really nice that you can pipe data from your HTML tags through so easily, but on the other hand it seems like there’s no place in the component where there’s a clear declaration of what attributes/properties are accepted. I could imagine if someone writes a larger component, there could be enough code that it could be confusing or intimidating to try to figure out which props are accepted. I could also imagine the pain involved in trying to rename props after they are being used in HTML in a lot of other places. I guess this is the nature of the Web and dynamic languages, but it seems like it would be fraught with peril in a larger production environment.

Anyhow, with just a few of these parameterized rectangle tags we can now display our first tetris piece:

        <Rectangle x="10" y="10" width="20" height="20"/>
        <Rectangle x="30" y="10" width="20" height="20"/>
        <Rectangle x="30" y="30" width="20" height="20"/>
        <Rectangle x="50" y="30" width="20" height="20"/>

http://jsfiddle.net/uglycoyote/z0aj3ysv/6/

Tetris block screen shot

And that’s a wrap for this post.

In the next post(s) I will explore creating a component to represent a tetris piece, animating the pieces, and the different between React “props” vs “state”

Follow this link to Part III of this blog.

Reactris, part I : Getting Started

I’m trying to learn how React.js works.  I have a website project that I want to apply it to, but that’s already wrapped up with too many other different technologies and I want to understand how React works better before trying to fit it in to a larger project.

So I thought I would tackle something simpler with React, but something that’s a little outside of the box, something that would hopefully be interesting and require some thought rather than just verbatim copying of existing samples.

I thought I would try to make a Tetris clone using React.

Getting the samples set up

First things first, I needed to be able to run the react.js samples.

I went to their getting started page (http://facebook.github.io/react/docs/getting-started.html) and downloaded the starter package (Version 0.12.1 is what is up on their site at the time of this writing)

I found that the simpler of these samples worked by browsing directly to the file, but the ones which have a separate .js and .html file do not work.  You’ll see something like this in the chrome dev tools console:

XMLHttpRequest cannot load file:///Users/mike/Downloads/react-0.12.1%202/examples/basic-jsx-external/example.js. Cross origin requests are only supported for protocol schemes: http, data, chrome-extension, https, chrome-extension-resource. VM166 JSXTransformer.js:219load

Fortunately, the React developers added a helpful message to the page:

If you can see this, React is not working right. This is probably because you’re viewing this on your file system instead of a web server. Try running

python -m SimpleHTTPServer

It’s worth noting that you should do this inside the ‘examples’ directory of their samples package (as opposed to running it inside a subdirectory for  a specific sample).   The samples reference a ‘shared’ folder which contains css and other resources which are shared between different samples.

I also found, somewhat annoyingly, that most of the samples get error 404’s when they request some .map files like es5-shim.map, which it is looking for under the shared/thirdparty directory but is not present.  Failure to find these doesn’t prevent the samples from working though.

 Choosing a sample to extend

For the purpose of this example, I thought it would be cleanest to use JSX and use the ‘external’ sample (with the .js in a separate file rather than embedded in the HTML).

In case you haven’t read up on JSX yet, the basic idea is that it’s an HTML-like syntax that’s embedded in the javascript code in lieu of using either (A) An HTML templating engine or (B) a more javascripty API for manipulating the DOM.

To that end, I made a copy of the ‘basic-jsx-external’ sample directory and started to modify the javascript in the copied directory.

Setting up an SVG Canvas inside of the React sample

I wanted to use SVG as my rendering technology for displaying my tetris game.  I haven’t seen an React sample code using SVG but since SVG is just another HTML-like syntax, and part of the DOM, I saw no reason why this should not work.

I’m not an expert on SVG either, so Baby steps… first thing is how do we draw a rectangle.  Here are the docs for the ‘rect’ SVG element from Mozilla:

https://developer.mozilla.org/en-US/docs/Web/SVG/Element/rect

inside of there I found this nice little snippet

<?xml version="1.0"?>
<svg width="120" height="120"
     viewBox="0 0 120 120"
     xmlns="http://www.w3.org/2000/svg">

  <rect x="10" y="10" width="100" height="100"/>
</svg>

Fortunately this translates over into JSX without any trouble, so I simply modified the return value of the ExampleApplication from the basic-jsx-external sample:

var ExampleApplication = React.createClass({
  render: function() {

  return <svg width="120" height="120"
       viewBox="0 0 120 120"
       xmlns="http://www.w3.org/2000/svg">

    <rect x="10" y="10" width="100" height="100"/>
  </svg>
  }
});

and there we have it, our sample now has on SVG canvas with a rectangle on it.

Screen Shot 2014-12-10 at 12.46.19 AM
Data driven Rectangle

so far this is not very interesting, I’ve just gotten React to spit out some static HTML.

Lets take the next step and put the svg canvas dimensions and the rectangle dimensions into local variables, so that the HTML is data driven


var ExampleApplication = React.createClass({
  render: function() {

  var svgWidth = 300
  var svgHeight = 300

  var x=10
  var y=10
  var width=100
  var height=50

  return <svg width={svgWidth} height={svgHeight}
       viewBox="0 0 {svgWidth} {svgHeight}"
       xmlns="http://www.w3.org/2000/svg">

    <rect x={x} y={y} width={width} height={height}/>
  </svg>
  }
});


While I was at it, I shuffled around the HTML a bit from the sample, got rid of some of the extra stuff in there and added some styles for the SVG and Rect elements to make them stand out a bit more from the page:


  <style>

    svg
    {
        background-color: #EEEEEE;
    }

    rect
    {
        fill : gray;
        border: 1px;
        stroke: black;
    }

  </style>

Here’s what it looks like after that:

Screen Shot 2014-12-10 at 1.01.49 AM

hey, it’s starting to look like something. Time to take a rest.

In the next posting, I’ll start hooking this in to React in a more interesting way. It seems to be the ethos of React to break everything up into separate components with their own createClass and render functions, so my plan next time is to make the rectangle a component, so that it’s easy to instantiate and control a bunch of individual rectangles.

Follow this link to the Part II of this blog.